```html
The Anatomy of a Dipstick: Understanding Its Design and Purpose
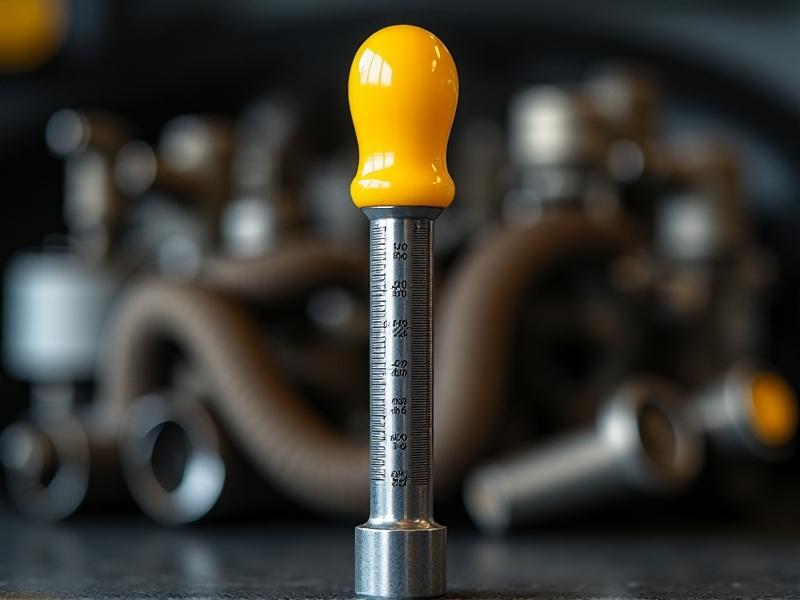
At first glance, a dipstick seems like a simple metal rod, but its design is a marvel of practical engineering. Typically made of steel or aluminum, it features a T-handle for grip, a slender shaft, and notched markings indicating "Full" and "Add" levels. The tip often has a perforated or textured surface to retain fluid for accurate readings. Manufacturers calibrate these markers to reflect specific volume requirements, accounting for engine size and fluid type. Understanding this design helps users appreciate why proper insertion and removal techniques matter—the slightest bend or wear on the markings can skew readings.
Modern vehicles may include electronic sensors, but the dipstick remains a failsafe tool for quick manual checks. Its durability ensures reliability in extreme temperatures, though material choices vary: performance cars might use heat-resistant coatings, while heavy-duty trucks favor thicker gauges. The dipstick’s simplicity belies its critical role in preventive maintenance, acting as a first line of defense against mechanical failures.
Engine Oil: Decoding the Lifeblood of Your Vehicle

Engine oil lubricates, cools, and cleans internal components, making its level and condition vital to engine health. To check it, park on level ground and wait 5–10 minutes after shutting off the engine—this allows oil to settle in the pan. Pull the dipstick, wipe it clean, and reinsert fully before withdrawing again. The oil should coat the shaft between the two markers. A level below "Add" risks increased friction, while overfilling can cause foaming and reduced lubrication efficiency.
Color and texture offer additional clues. Fresh oil has a translucent amber appearance, while aged oil turns dark and opaque due to contaminant buildup. Milky streaks suggest coolant leakage—a serious issue requiring immediate attention. Seasonal changes also affect viscosity; thinner oils flow faster in cold climates, potentially creating the illusion of lower levels. For accuracy, consult your owner’s manual for ideal check intervals and oil grades.
Transmission Fluid: The Silent Performer’s Vital Signs

Unlike engine oil, transmission fluid operates under high pressure and heat, enabling gear shifts and torque transfer. Its dipstick is often shorter and located near the firewall. Checking requires the engine to be running and warmed up, as cold fluid contracts and gives false-low readings. The fluid should appear bright red and emit a slightly sweet odor. A brownish tint or burnt smell indicates overheating or worn clutch materials, signaling the need for a flush or repair.
Low levels here are particularly dangerous. Transmission systems aren’t sealed; fluid loss can lead to erratic shifting or complete failure. However, overfilling is equally problematic, as foamy fluid fails to transmit hydraulic pressure effectively. Use a funnel to add small increments, rechecking frequently to avoid overflow. For CVT or dual-clutch systems, refer to manufacturer guidelines—some modern transmissions lack dipsticks entirely, relying on dealership scanners for analysis.
Beyond the Basics: Coolant, Brake Fluid, and Power Steering
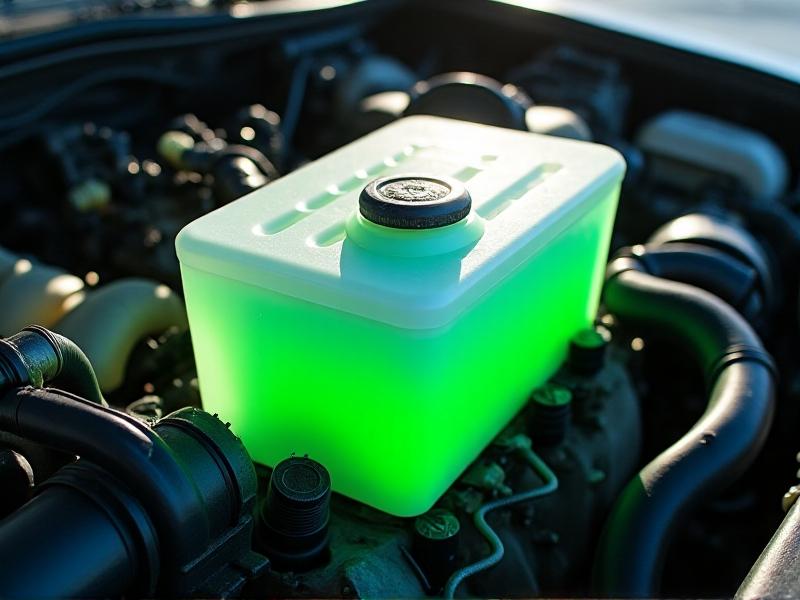
Coolant levels are checked via a translucent reservoir marked with "Min" and "Max" lines. The mixture should be vibrant green, orange, or pink, depending on the formula. Cloudiness or rust particles suggest corrosion, while a oily film may indicate a failing head gasket. Never open the radiator cap when hot—scalding pressurized coolant can erupt violently.
Brake fluid reservoirs are typically small metal or plastic containers near the firewall. Fluid should be pale yellow and clear. Darkening implies moisture absorption, which lowers the boiling point and compromises braking. Power steering fluid resembles transmission fluid but is checked with the engine off. Foam or grime here points to air leaks or worn seals. Always use the fluid type specified in your manual—mixing formulas can degrade performance.
Common Pitfalls: Why Your Readings Might Lie
Even seasoned drivers make mistakes. A frequent error is checking fluids on uneven ground, which tilts the pan and distorts levels. Dipping too quickly can splash fluid upward, creating false-high readings. Conversely, not fully reseating the dipstick might leave the tip above the fluid, showing artificially low. Temperature also plays tricks: cold engines underreport oil, while hot transmissions overstate fluid volume.
Using the wrong dipstick—say, from a different model—introduces calibration errors. Aftermarket parts must match OEM specifications. Contamination is another issue: dirt entering the reservoir during topping off accelerates component wear. Always clean the area around caps before opening. Lastly, ignoring seasonal viscosity changes can lead to overcompensation. Winter may require thinner oils, but resist the urge to overfill—stick to the manual’s guidelines.
Reading Between the Lines: Fluid Condition as a Diagnostic Tool
Fluids reveal secrets beyond volume. Engine oil with metallic flakes hints at internal wear—think piston rings or bearings. Bubbles or froth suggest aeration, often from overfilling or a damaged crankshaft seal. Transmission fluid that smells like burnt toast confirms clutch plate overheating. Coolant with an oily residue? Likely a leaking oil cooler or head gasket failure.
Brake fluid that’s turned murky signals water infiltration—a major concern in humid climates. Power steering fluid resembling chocolate milk indicates water and dirt mixing, often from a compromised hose. Even windshield washer fluid isn’t exempt: sludgy buildup implies bacterial growth, which can clog nozzles. Documenting these changes during routine checks helps mechanics diagnose issues faster, potentially saving hours in labor costs.
Precision Practices: Tools and Techniques for Pros
Enthusiasts and professionals elevate accuracy with tools like laser thermometers to check fluid temperatures pre-inspection. Digital oil analyzers measure viscosity and contaminant levels, offering insights beyond the dipstick’s reach. For transmissions, scan tools can read fluid temp via the OBD-II port, ensuring checks occur within the ideal 90–110°F range. Calibrated funnel kits prevent spills during refills.
Technique refinements matter too. When wiping a dipstick, use a lint-free cloth to avoid fibers altering readings. For engines with dual oil pans, some mechanics check multiple times, rotating the dipstick 180 degrees to account for shaft warping. In racing applications, where fluid dynamics are critical, teams often install sight glasses or transparent reservoirs for real-time monitoring. These methods bridge the gap between analog tools and digital diagnostics, delivering laboratory-grade precision in the field.